google ads

Performance Max Campaign a Step by Step Guide

Performance max campaign step by step guide

Performance Max Campaign Setup in Google ads:

Hey Whatsup Guys, Today we are going to talk about some interesting facts about the performance max campaign in a step-by-step way.

Follow veeramohan Rengaraju for more update like this.

First, we need to create a campaign by clicking the plus icon. But in this case, we are going to use a performance campaign.

what is a performance max campaign in google ads?

Performance Max campaigns are the latest and most powerful type of campaign that Google Ads offers. These campaigns are designed to maximize the potential of your ads by increasing conversions and ROI.

Performance Max campaigns are built on a tiered structure, which means that you will have different types of bids for your ads, depending on how competitive they are. The more competitive the keyword, the higher your bid will be to get it to show up in search results.

How to Scale Performance Max Campaign?

Performance Max is a campaign that aims to provide the best possible experience for users. It is based on the idea of providing the best experience for your customers, which in turn will lead to higher conversion rates and better customer satisfaction.

There are three main objectives of this campaign: 1) Maximize Conversion Rate 2) Optimize Customer Satisfaction 3) Optimize Customer Lifetime Value.

Performance Max Campaign Requirements

The Performance Max Campaign is a campaign that provides a way for advertisers to measure the effectiveness of different types of media and marketing. It is an interactive campaign that allows you to make changes and see how they affect your results. It includes the following:

– The Ad Builder is a tool that allows you to create your own ads, including text, images, and links.

– The Media Library is where you can upload images or videos for your ad.

– The Analytics Dashboard shows performance data about your campaign, such as impressions, clicks, conversions, cost per click (CPC), cost per conversion (CPC), and cost per thousand impressions (CPM).

– The Targeting Tool lets you choose which websites or categories of websites your ads will appear on.

– The Settings page lets you choose what type of ad schedule to use and what type of campaign duration to use.

Performance Max Campaign Reporting

Performance Max Campaign is a campaign reporting tool that enables marketers to track the performance of their campaigns.

This tool can help marketers to analyze the performance of their campaigns and improve them accordingly.

The Performance Max Campaign Reporting Tool has a number of features that allow marketers to measure the success of their campaigns:

-Campaign tracking -Campaign analytics -Segmentation by demographics, geography, device type, operating system, browser type, etc.

-Integration with Google Analytics and other marketing tools for cross-channel analysis

-Customizable reports

What Inputs Does Performance Max Campaign Use?

Performance Max Campaign is a marketing campaign that is designed to increase the conversion of website visitors into customers. The campaign can be used by any company or individual who wants to increase their conversion rate.

The inputs for this campaign are:

– Landing page URL

– Target keywords

– A call to action button (CTA)

– Campaign Goal

– Audience Signal

– High Quality Creatives

– Conversions

Why Performance Max Campaigns So Important?

Google Performance Max Campaigns are an important part of Google Adwords, which is a paid advertising platform. They help advertisers amplify the visibility of their ads.

It is important for advertisers to use these campaigns because they can help them reach a wider audience and generate more conversions. These campaigns are also an effective way for advertisers to make sure that their ads are being seen on mobile devices and across different networks.

Here are the 6 different network placements it can reach to target audience:

– Google Search Network

– Google Display Network

– Google Discovery Network

– Google Maps

– Gmail 


What choices and options are available to me with Performance Max campaigns?

Agencies can customize their campaigns to meet the demands of their clients using the extensive options and controls that Performance Max offers. This comprises:

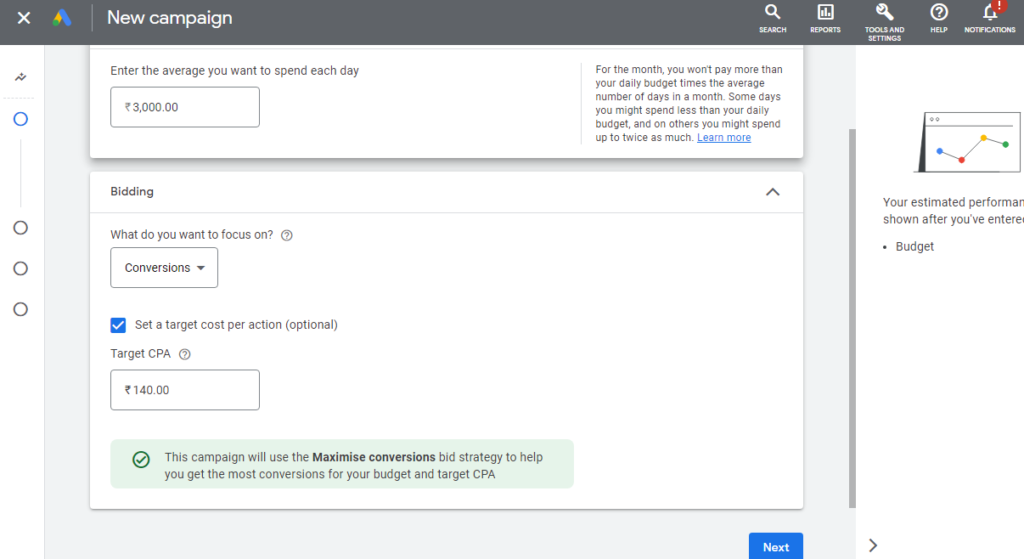
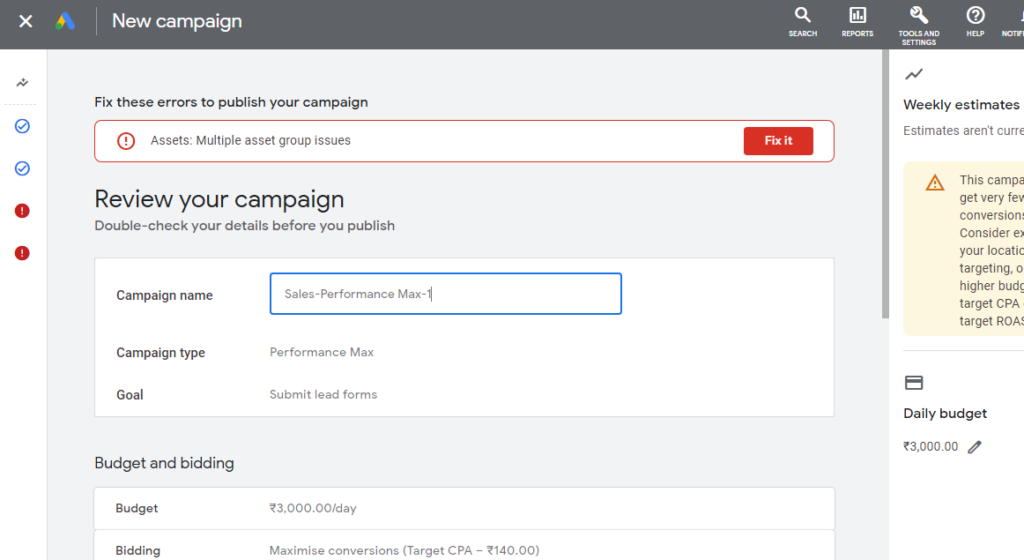
Budget: Establish your budget in accordance with your conversion goals.

Smart Bidding offers you five different bidding strategies to use:

Target Cost per Action (CPA)

Target Return on Ad Spend (ROAS)

Maximize Conversions

Maximize Conversion Value

Enhanced Cost per Click (ECPC)

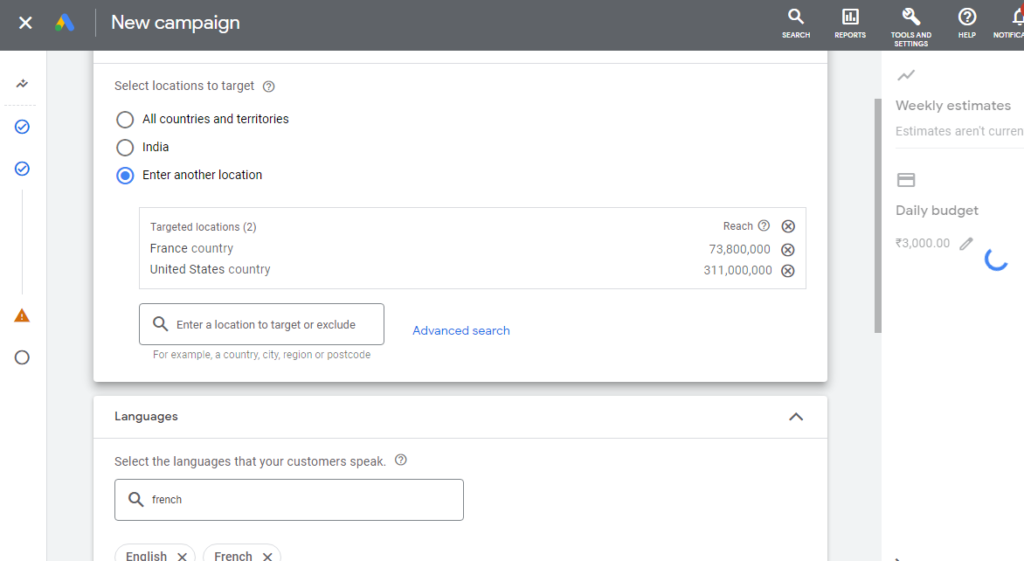
Location: Where will your advertisements appear?

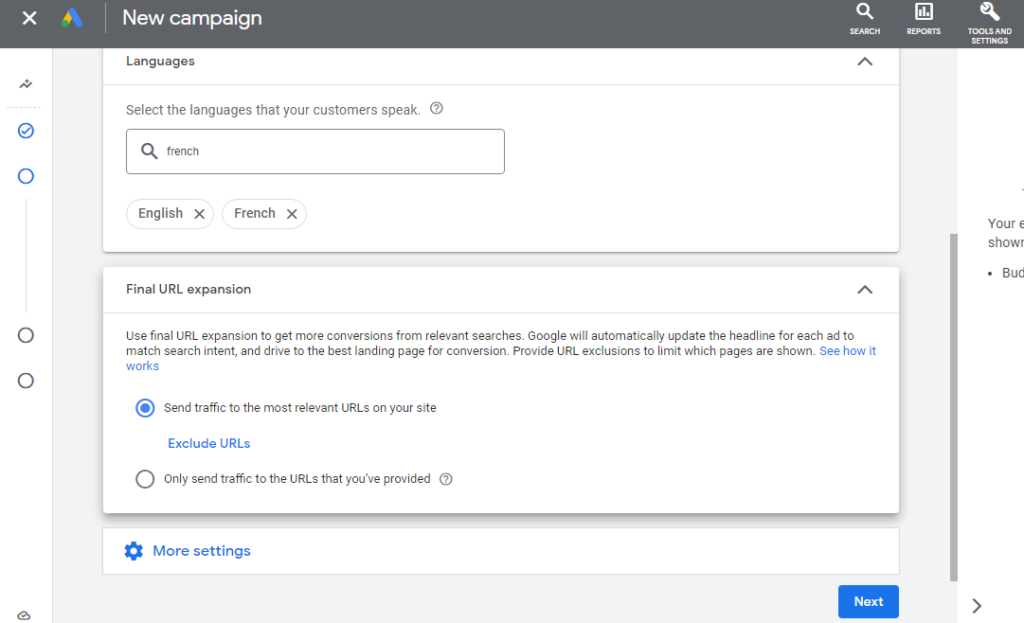
Language: What language to target?

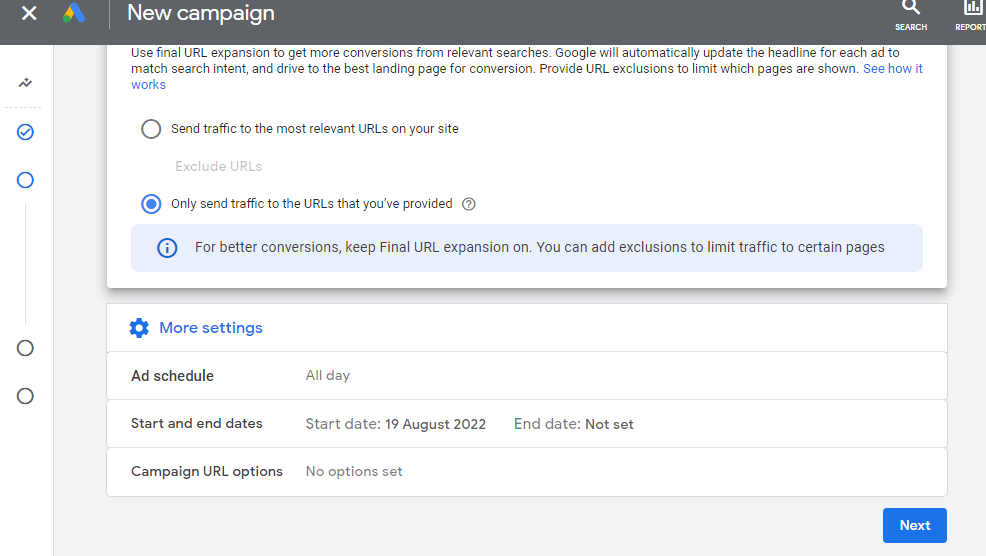
Ad Scheduling: Schedule your ads and decide when they will run.

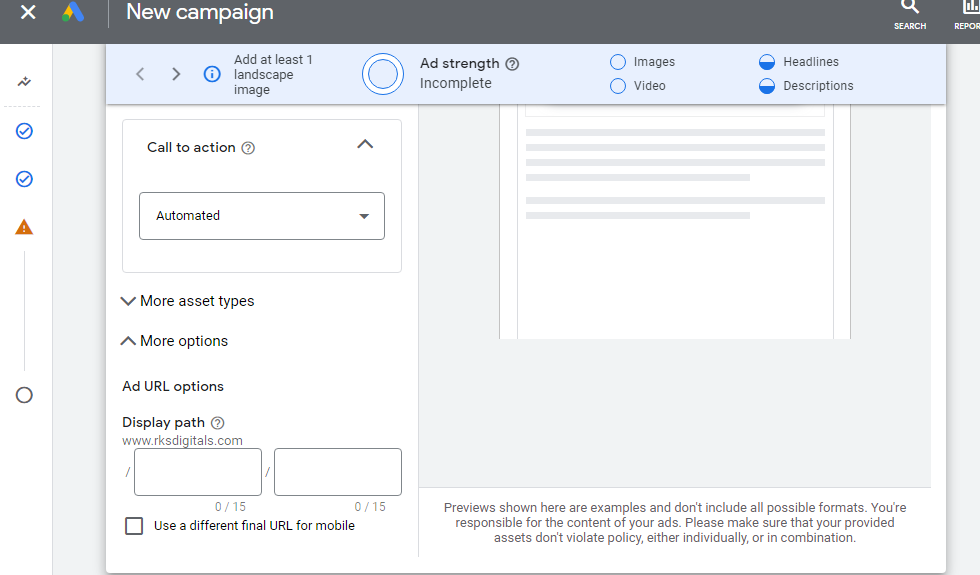
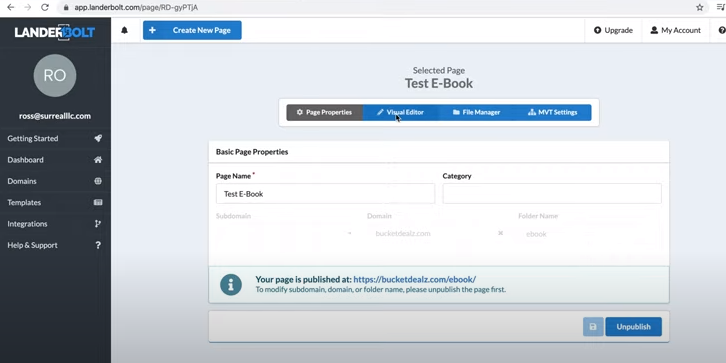
URL Option: Choose whether you want Google to send traffic to the URLs on your clients’ websites that it thinks are the most relevant, or whether you only want traffic sent to the URLs you specify.

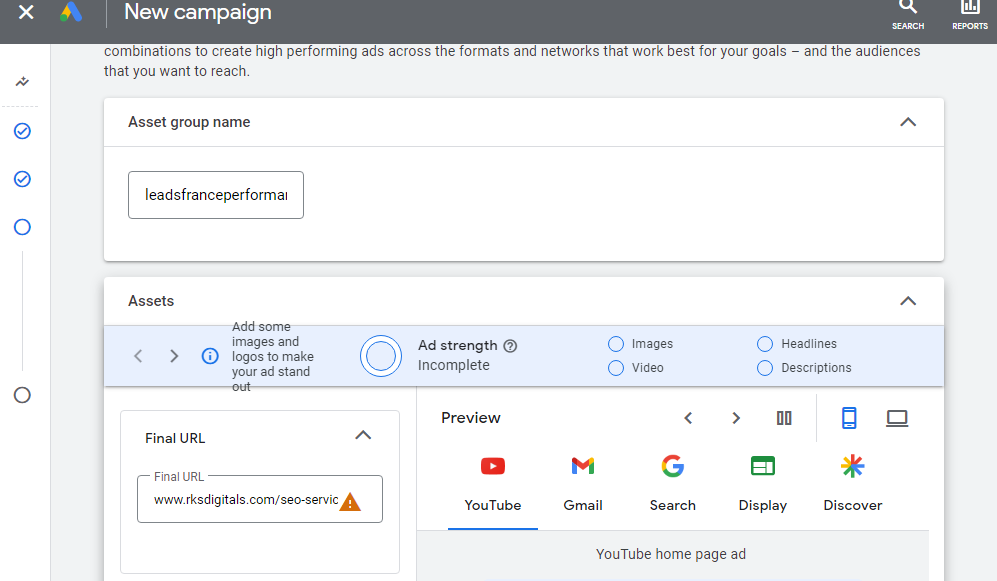
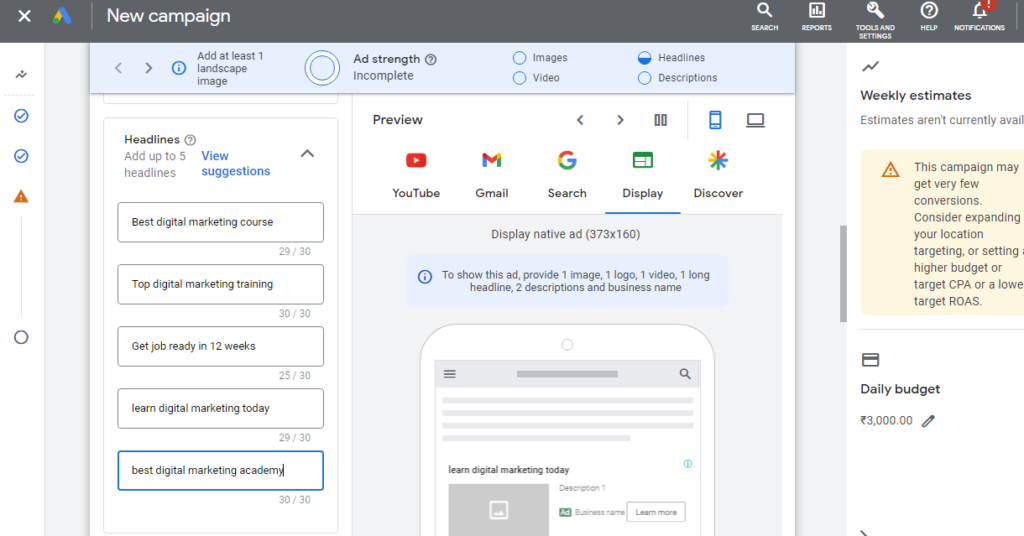
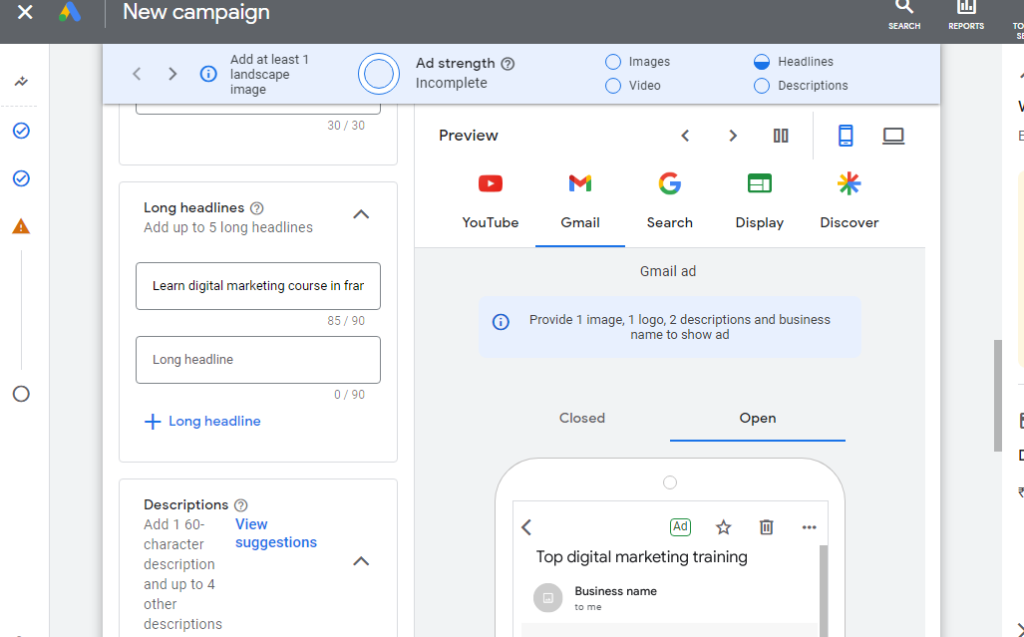
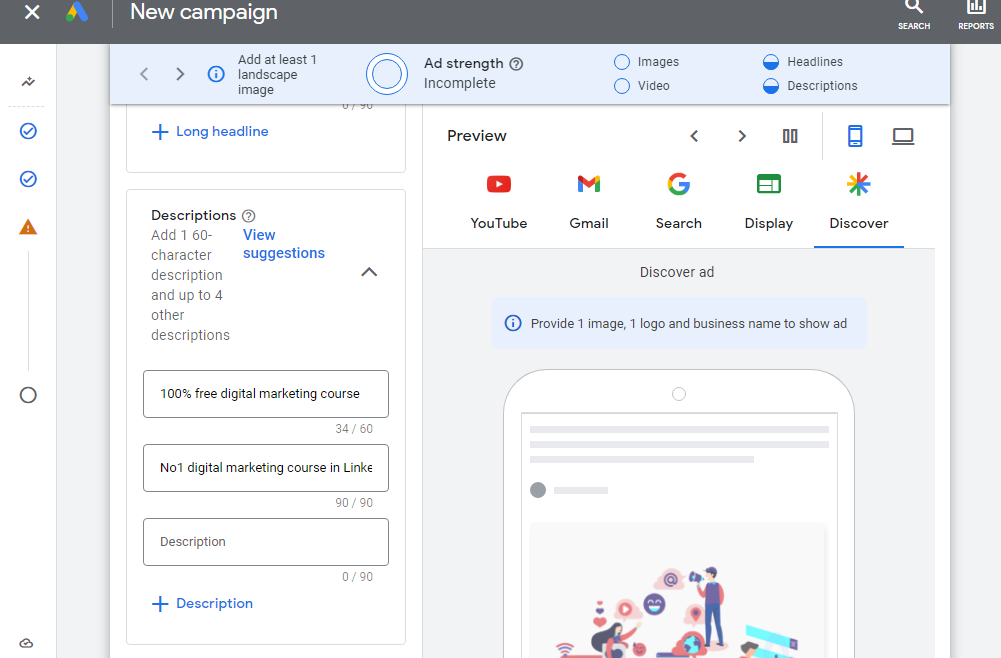
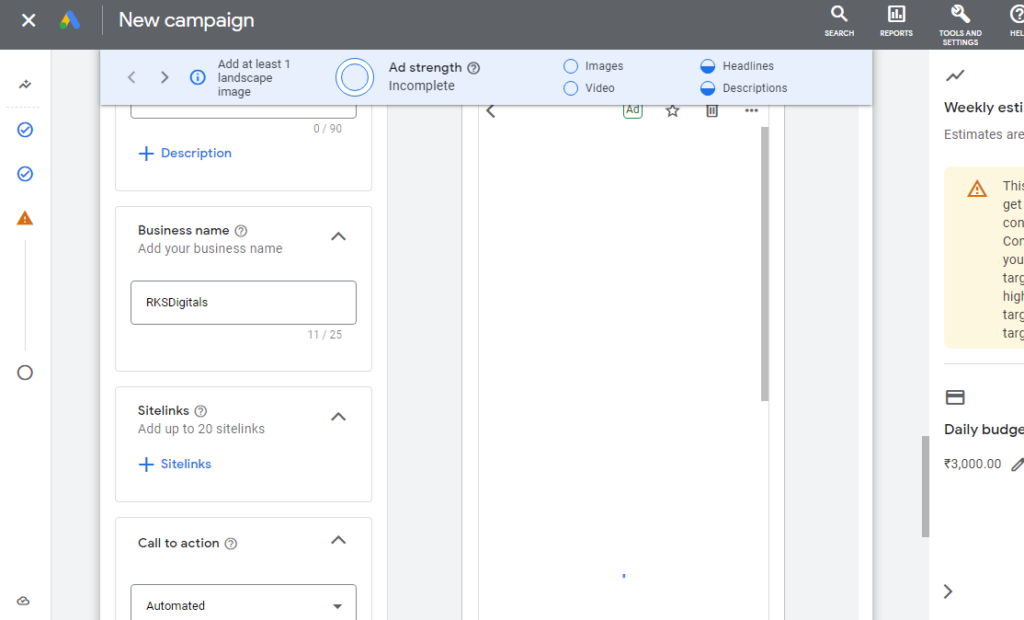
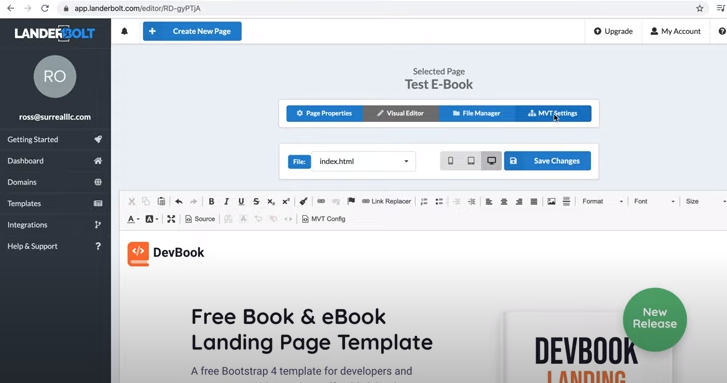
Asset Groups: These are essentially ads that are simple to set up; all you need to do is supply the creative (such as logos, videos, headlines, etc.), and Google will take care of the rest.

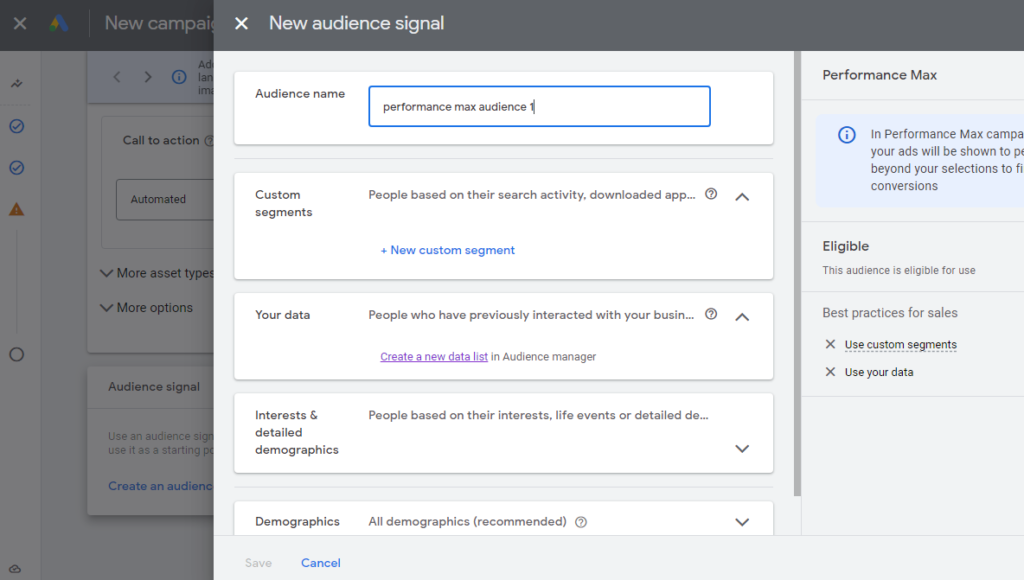
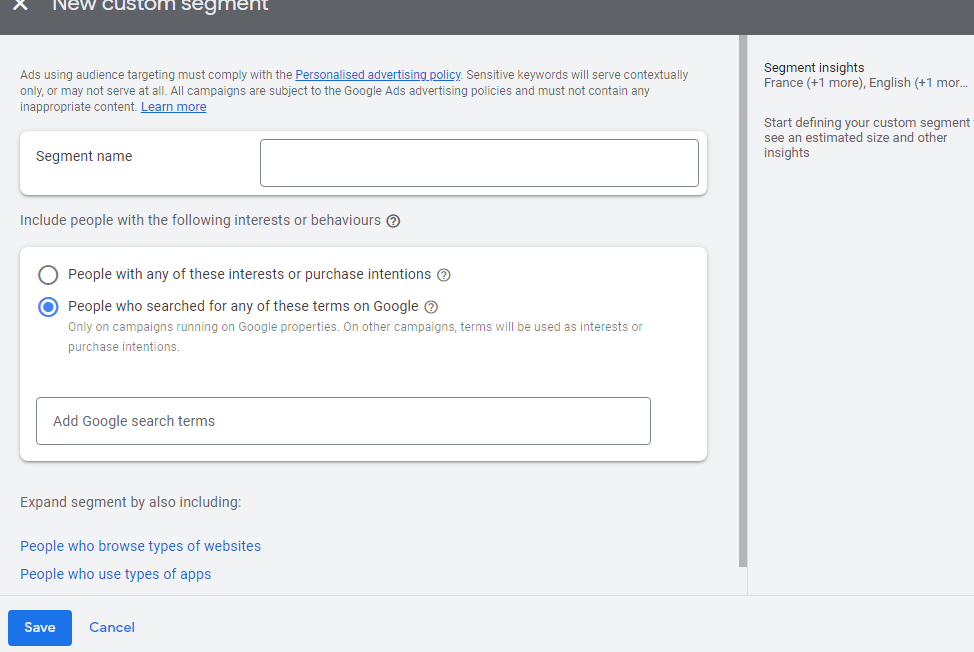
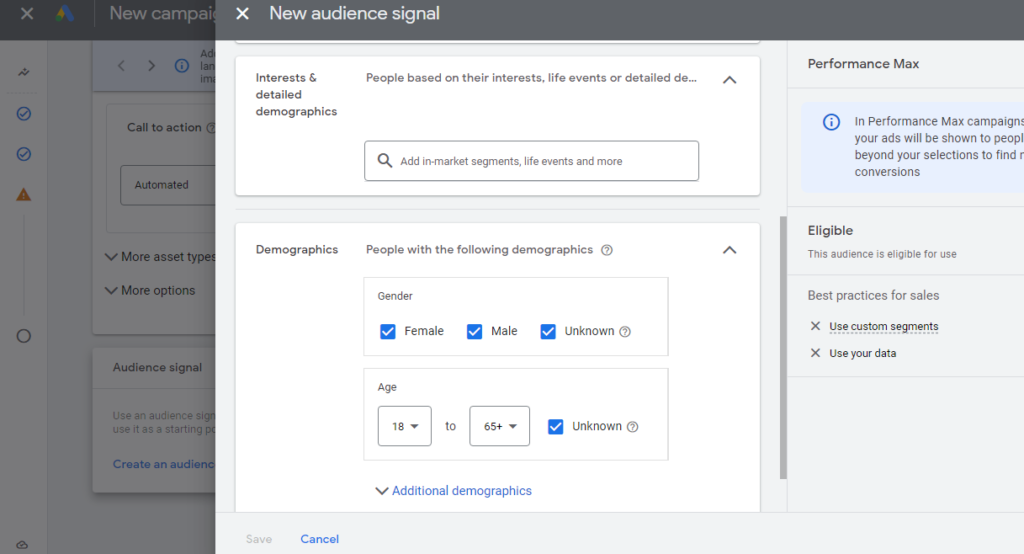
Audience signals: This is where you can influence the targeting that is done automatically.

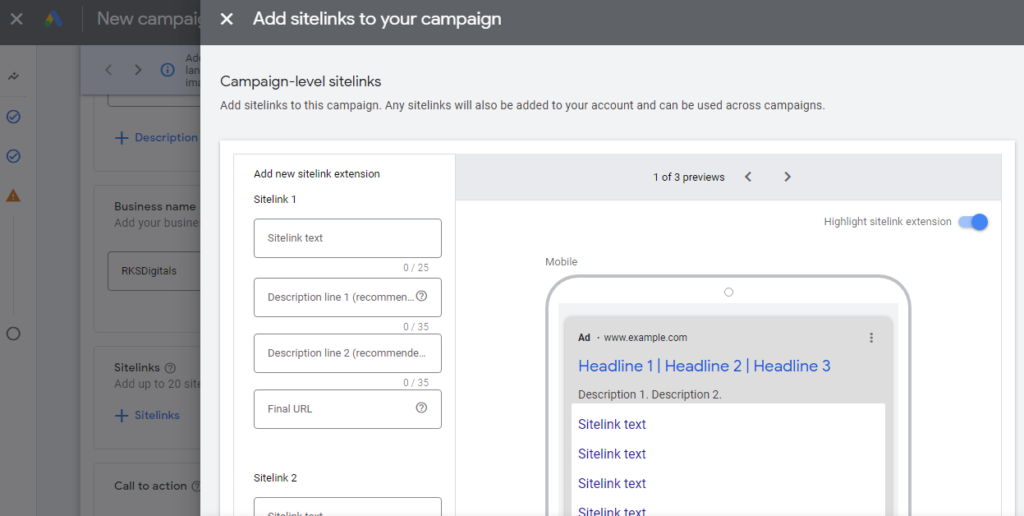
Ad Extensions: Select whether to generate campaign-specific sitelinks or use pre-existing sitelink extensions.

How to Set Up Performance Max Campaign

In a performance campaign, we need a conversion, sales, or purchase to determine our goals.

How to set conversion in google ads:

To set up a conversion campaign, we need to go to tools and setting on the top of the channel, and then we need to click conversion.

set up conversion in google ads

I have a signup conversion already set it up. But in this case, we need to set up a lead conversion.

Creating New Conversion Action:

To set up a new lead conversion. Click Create new conversion and then click on the website.

create new conversion
website conversion in new conversion action

Next, we need to give our domain. In this case, I have to give RKSdigitals and click scan. Now google will scan whether we have set up google analytics in google ads.

Setting website url for conversion

Next, basically, it will show you a simple leads page setup, and then I have to select a category. I’m going to select it as submit lead forms. Since we are doing a lead generation campaign.

Next, we need to select the type, most of the people were choosing URL. It is such a dangerous thing because www beginning at the domain, usually exact match of the URL is not a safe way.

That’s why I always recommend people to use URL contains. Let’s take RKSdigitals as the example and we don’t have the thank you page. But let’s take if we have a thank you page.

So next in the column we are going to write it as thank you. So just inform google that as soon as Url contains thank you. Consider that as a submit lead form. It’s as simple as that.

And I’m going to click on add. That’s it we are done with the page setup and the next thing we are going to do is to create conversion action manually using code. So when you click on that I’m going to set it up in detail. So I’m going to choose to submit the lead form again and the conversion rate would be submit lead form 2 for example.

 
conversion goal & action optimization

Conversion Value & Count:

In value, we can give for example let’s say that when somebody becomes a lead on average like when you have sales and divided sales to the leads you know that each lead is let’s say 90 dollars to you. Like they bring you 90 dollars and in that case, you can actually make some kind of ROI calculation. We can use that. But in this lead generation, we don’t even do that.

Since in ads manager we can see whether it is profitable or not. So we can use don’t use value.

In the next section, we have to use whether every or one. In this case, we clearly use one. Since one person gives five different times the same information. Since it will not consider five different leads.

conversion value & count

So I will be going with one. If I’m selling something let’s say I sell t-shirts. If somebody buys five times a t-shirt and it is five times a sale. In that case, I will be using every here.

But in this case, one person can be a lead one time. So I’m using it as the one here.

And the rest of the things I’m going to leave as it is. But you to know click through eCommerce window 30days it bit long. But I will keep it as 7 days. But I’m not going to do it right now.

conversion count

We already did the first part of the conversions already. Now the next part is going to put some part of the code in the header tag. This section basically gives you an HTML tag. What I’m going to do Is put it on the header section of the website.

 
conversion tag

This way google can identify whether we have set up the tracking code on the landing page or the website. Which we need to track.

We can even set up our goals using google analytics to do that we even need google tag manager. Which can manage all your tags in one place.

If you have set up google analytics and google tag manager properly. You can able to track anything you want from the website.

If we have set up this properly. We can able to track when somebody clicks your button or scroll across the pages and that needs to be tracked as a conversion. We can able to do that.

Creating a Performance Max Campaign Setup:

It is easy to create a performance max campaign in google ads.  Let’s go through the step by step process below.

creating new performance max campaign

Now, let’s move to set up our performance max campaign. Just click create a campaign and then I’m going to select leads and after that, we need to select the conversion. In this case, I can select the one which we created just before and I’m going to click continue.

Step 1: Setting Up Campaign Objective for Performance Max

campaign objective sales

Step 2: Setting Up New Campaign Type for Performance Max

Next, I’m going to select performance max as the campaign type.

campaign type performance max

Step 3: Campaign Location Targeting

And in the campaign name. We are going to run a lead generation campaign for the country US and France.

country and language campaign settings

In this case, I will take it as France. So I’m going to create a campaign name as leadfrancePmax and then going to continue.


Step 4: Determine Budget & Bidding for Performance Max Campaign

The first thing we need to put our budget. So I’m going to put it as INR 3000. If we have a higher budget. It will show on as many as 6 platforms. So if you are someone trying to place an ads at a budget of 10, 15, or 20 dollars a day. It won’t work. Since it needs more budget to show it to as many as six platforms. Which this performance max tied up. We need to target at least 100$ a day would be the ideal to test this campaign performance for country like India or Pakistan. If you are targeting a country like us, Canada, or some other foreign countries. I suggest you test it out on more budget for optimizing this campaign’s performance.

average budget per day and bidding

And next step we need to set up is whether our campaign goal is conversion or conversion value. In this case, I’m going to select conversion, and next we need to check the drop box to set value for each conversion. Let me take it as INR 140 for each conversion and click next.

And let’s go to the next step is to select the country you need to target. In that case, I’m going to select France. If we want to target some part of the area in France. It won’t give you enough leads. As there will be opportunities in another part of areas in generating leads. Which will not be added if you are targeting a specific area. I would suggest you target the entire country for better results.

So I’m going to select France in the next section. We need to select our language. In this case, I’m going to select french. But usually, we can select it as all languages. Since it is the best practice to go with. But in my case, I’m targeting France. So I’m selecting french.

selecting targeting language for campaign

In the next final URL section. We need to set whether we need to land our users on a different landing page which google optimize to show the relevant content. Google will provide a different set of landing pages to different users based on their behavior or else if you want to get the users to the specific landing page. Then you can select the second option. Which can help your users to land in the specific URL that you provided.

Step 5: PMax Campaign More Settings

final url expansion

Next, we can even set some more advanced features in more settings. But for this, I can leave it as it is. But for you to understand I will tell you more about this here.

In more settings, we can able to set an ad schedule where we can specify at which time our ad will have to show to users. Let me take for example. If any ads need to run from morning 9:00 Am to Evening 6:00 pm. I can specify that here.

Next in more settings, it will ask you for the start and end date of the campaign. Let me take for example. I can give it as from today to August 30th.

Next is setting the campaign URL option. We need to give URL parameters for tracking purposes. Which can help you in identifying who are all clicking the ads or visiting my website. We can track from this.

And once we have done with all here click next to move to asset group.

Asset group will help you set up ads for six different places. We can set up title, descriptions, images, videos, and landing pages for these places.

Step 6: Asset Group Setting in Performance max Campaign

In the asset group, first, we need to give our landing page. For this, I will take it as https://wwww.rksdigitals.com

Next in Image, we can set up to 2o images here. Let me select the image and choose from my library or from my desktop. Once you have selected all the images click save to save them in the campaign.

Asset Group Name & Final Url

Next in Logo, We can select upto 5 logos. But I will select one logo for my demo purpose.

Selecting image, logo and videos for performance max campaign

Next in videos, We can select up to 5 videos. But if you don’t have a video, google will create it automatically as possible. Based on the images and text which we have given.

Next to the headline, We can put up to five headlines. For this demo purpose, I will put some headlines from my list which I have already created.

selecting headlines for performance max campaign

In the first headline, I will put “Best digital marketing course” and in every headline, It should have a maximum of 30 characters. So put it accordingly.

Next, it will be of “Top digital marketing training”, Get job ready in 12 weeks, learn digital marketing today, best digital marketing academy.

I have put all those five headlines. Next, we can set up long headlines for the campaign. We can set up up to 5.

Long headlines for performance max campaign

But for here I can put one long headline as this “Learn digital marketing course in France and get your dream job in less than 3 months as desired”.

Next, we need to give five descriptions. We can able to give up to 4 descriptions.

campaign short description for performance max

Now we can pick one short description. We put it as “100% free digital marketing course” and for long descriptions, I can give it as “No1 digital marketing course in LinkedIn. Make you a growth hacker and performance marketer”.

You can give it as you want in the description.

campaign ad strength

You can check whether you have given all that information as per google guidelines. You can see it at the top. If everything is fine. It will show you the blue tick mark.

Step 7: Setting up Call to Action for PMax Campaign

business name, sitelink and call to action

Next, we need to set up a call to action. We can select it manually or google will select it according to six placements like youtube, display, search, Gmail, and google discover.

If we select manually we need to give a manual call to action. For this, I will give it as Automated. Which google can help us in the call to action.

Next we need to type the business name. you can type your business name. for this, I can type it as RKS Digitals.

Next in more options. We can give a display path URL. We can give a dummy URL here like the digital course.

call to action

If we have given a different URL for mobile. We can check the different final URLs for mobile. Otherwise, we can use it as it is or not check the box. For this, we won’t check the box. Leave it as it is.

Step 8: Setting up Audience Signal for PMax Campaign

Click Create Audience signal and audience name as performance max campaign audience1

new audience signal

Next custom segments, Which are used to get the people based on their search activity or downloaded apps, or visited the site

Add or create custom segments. Just click browse. We can able to see the custom audience we have already created. We can select from the list or we don’t have any custom audience segments.

custom segments

Then we can choose to create custom audience segments and in that, we have two options. One is for people who have any of this interest. For example if any of the interested in your search terms. It will show the ad to all the interested people.

Or else people who searched any of the terms in google. Let’s take an Example. People who searched Digital marketing, and growth hacking in google. It will show to those people.

Then select your created segment.

Next, will be your Data, it’s remarketing campaign data. Let’s take an example if you run a campaign previously and you have more site visits. Then we can able to target that audience as well using this section.

So, you can select your remarketing campaign from the list to target.

Step 9: Setting up Interest & Detailed Demographic for PMax Campaign

Next Interest & detailed demographics, In this we can use in display or video campaigns using audience-wise targeting and content-wise targeting

add inmarket, life events in interest and detailed demographics

If you are targeting an audience wise then we can audience market and demographics. Life event, affinity.

Now click and in the browse, we can select in-market, demography, life event and affinity audience will show here. Let’s take me if my audience is interested in beauty and personal care, business & industrial products, and business service. It will show those who are all interested in the above category.

You can select your targeted audience topic interested in using the above segments in market segments

Next, we will move to life events, it will show the ad to people who are later involved in or going to involve. Let’s take an example college graduates, if my ads need to show to people who are going to finish their graduation or finished their graduation recently. I can select this category.

 
Interest & detailed Demographics

Next Detailed Demographics, We can set up parental status, marital status, and education, according to this category of people. We can target.

Next Affinity segments, in this we can target beauty and wellness, food and dining to target relevant categories. In this case, I have selected the technology category for my niche. You can select accordingly you want.

Next Demography: we can select gender, age, marital status, and household income we can select accordingly we want to target our audience.

We have four options to target our audience and then click save to save your campaign and then click next to move to extensions. We can able to give as much as site links as you want to show to your search networks.

Add sitelinks to campaign

If you want a site link extension. You can create as many as site links you want you can create it. Next call extensions, suppose if you put callout extension, it will show all the call-out unique information.

If you have properly set up all your extensions and then you can click next.

Step 10: Summary Option ( Reviewing Performance Max Campaign )

You can review all your updated information here and also google will check if there is any error in the setup or not.

reviewing campaign setup for errors

If there is no error in the setup. You can publish your campaigns if there is any error on the review page. You can solve those errors and publish your campaign.

Once the ad is live. You can track the performance by going to the insight tab. Where they can show you how many times an ad is shown to people,

Next in the asset tab, we can able to track where and all my ads are shown in the six placements like google search, display, Gmail, youtube, google map, and google discover placements. It will show all relevant data for these placements.

This is how we can set up the performance max campaign and how we can track the progress of max campaigns in google ads.

I hope this article will guide you step by step process in setting your next performance max campaign for your digital goals to be achieved.

I hope you enjoy this article and if this is really helpful in setting up your campaigns.

Please give me a Thumps up and if you have suggestions write me in the comment section and if you really feel it’s worth sharing with your network. Then please do me favor by sharing it with your network.

Cheers,

Follow veeramohan Rengaraju for more updates like this.

Performance Max Campaign a Step by Step Guide Read More »

A step-by-step process to Duplicate Any Website / Landing Page in Just 30 Seconds

duplicate any website

Hey, Today we will discuss about how to duplicate any website in just one click and you know this is not clickbait.

I’m literally really going to show you how to get any website you want, any landing page you want, and any page you find on the web you can have in just a click.

 I mean the trick is to get it in a click. So I’m going to show how it’s done and this is particularly useful if you let’s say find a product on Facebook that somebody else is advertising and you want to test that out for yourself for your business.

But you don’t have the time or you don’t want to spend time and money building the website creating everything from the scratch and later figure out that this product sucks and it doesn’t work and doesn’t make you money.

So this is useful to test different products, and different landing pages super fast, so you don’t lose time and money on just building something that it’s not going to sell. Now I have a demo page here I found on the web, so I’m going to duplicate this one.

landing page for duplicate

LanderBolt for Duplicating any website or landing page in just 30 seconds:

I found a template so we’re going to sink this landing page into my own domain name and this is going to be my landing page so I used a tool called landerbolt.

lenderbolt landing page

I’m using this for a while and it’s a pretty cool tool. Let me download the entire landing page and put it on my domain name and I’m not promoting this tool.

I’m not associated with this one, I don’t get paid to talk about it, but it’s pretty cool. I mean it’s pretty useful so I decided you to know that.

Why not I just should’ve even shown it to you guys. so yeah let’s do that, so I’m here to show you the lenderbolt dashboard and it’s pretty simple, you have different templates.

lenderbolt dashboard

How to Duplicate Any Website using Landerbolt:

Landerbolt’s most well-liked and powerful function, the universal page importer, allows you to paste any URL and immediately import that landing page. Copy and paste your URL to do split tests, visual edits, domain assignments, multivariate tests, and much more.

Go Live in under 30 Seconds:

Launching and going live using LanderBolt takes 30 seconds (seconds with pre-existing pages). You can utilise your own domains, and our page properties dashboard makes it easy to create sub-domains, folders, and landing pages on your root.

Scaling, split testing, and running traffic are all equally simple and quick.

Any website file may be uploaded. There is no requirement for hosting:

Your site will be live and open for traffic in 5 seconds after you simply drag your files into a.zip format. Many professionals keep their own landing pages locally saved. The.zip Import is quick and simple to use, allowing for rapid deployment.

Use One Of Landerbolt Templates To Get Started

The visual editor automatically adjusts to the chosen template, including tracking scripts, pictures, and the overall look and feel of your page. If you conduct a lot of split testing, you may also design your own templates to ensure that you always have a “control” version.

Landerbolt Uses Visual Page Editor "Like" WordPress

Working in the visual page experience with the ability to move quickly can be quite beneficial. Use a platform that is even simpler than Microsoft Word to create efficient, clear, conversion-boosting pages without the use of coding, plug-ins, add-ons, or additional work.


Although the page editor is more than capable of handling the majority of requirements, you cannot create pages from scratch with our editor. To learn more about our custom page development services, contact us.

LanderBolt Lightning Page Loading with Instant ROAS:

Bring the traffic on! You lose time and money when a page takes a long time to load. Utilizing LanderBolt’s Lighting Loading cloud platform, our hosting solution employs a unique cloud hosting technique to enhance, monitor, and optimise your load speeds. Because of our 99.999% Uptime guarantee, you won’t have to worry about losing money because pages won’t load.

Creating a New page using Universal Importer:

create new page in landerbolt


So I’m going to click create new page and then I’m going to click Universal importer

universal importer landerbolt

The next thing we’re going to do is I’m going to copy the URL of this page.

copy that and we’re going to come back here and now it asks you which page you want to import and you can import literally whichever page you want on the web maybe for e-commerce, or for a Shopify page, or digital high ticket selling landing page.

Whatever page you want so we’re going to paste that here and now we want to put a page name.

create a page in landerbolt

So this is going to test a book let’s say and I have to pick a domain name so I have a bunch of the main names so we’re going to use bright ideas.

No, we’re going to use bucket deals dot com and then you have to put a folder and I’m going to put folder ebook.

—>  Bucketdeals.com/ebook

Let’s say now if you go to this domain name right now and put ebook it should be empty so let’s test that out.

url not found issue in landerbolt page setup

Let’s test it out bucket deals dot com slash ebook if I hit enter okay it says nothing found.

If I put it like that let’s see yeah nothing is found and let’s see if this Universal page importer is going to work.

 
landerbolt new page setup

So I’m going to hit create a page and now the magic is happening let’s see. So it’s a page created successfully that took like a couple of seconds and I’m going to click publish and we should be ready to go.

Let’s come back here to this URL and refresh and see if everything is fine.

new page updated through landerbolt

Refreshing and boom folks,

There we have it entire website in just a bunch of seconds. So now I can start split-testing, I think it’s even mobile-friendly let’s see if I shrink that yeah it’s responsive look at that beautiful.

Changing Contents, images, and colors for the copyright issue:

Now some people have copyrights on their pages. so what I usually do in my practice is out to download and I’ll duplicate the landing page on our website and then I will change some of the colors the images, then the text and I’m just going to keep the framework which the framework is pretty much universal for most of the sites and this can be done inside a lenderbolt.

LenderBolt Landing page Visual Editor for Developers:

So let’s see I’m going to come back here I’m going to click visual editor

And yes it has an actual visual editor look at that so you can see your landing page inside\and you can start just double-clicking some text and let’s say free book.

Actually here I tell you about the free book, this is my page now and you can edit wherever you want next thing is if you’re like more advanced you know how to code, you know how to develop, you know about you are aware of HTML, CSS.

landerbolt visual editor for developers

You can click the source code and basically, it’s going to show you let me pull that down it’s basically going to show you the entire source code here.

So you can edit it if you want you can put your Facebook pixel, Google pixel, tag manager, or Google Analytics. The next step is the file manager and what it does is basically it’s giving you access to all of your files.

landerbolt file manager

Which none of the other tools are doing that like click funnels don’t give you access, Unbounce, the Squarespace, all these page builders don’t give you access to your files, and here I have it.

So I can edit even my JavaScript when I click that I have the analytics here, I mean if you want to edit the javascript file you can do this by clicking here. If you even don’t know about it. It’s not a problem.

But it’s an option which is pretty cool bro, so it gives you all these I have access to the CSS here this is the main CSS, this is not the main this is the theme CSS.

if you don’t want it or if you don’t understand how to edit CSS you don’t need to go to a visual editor and it’s just completely fine.

So yeah you can change images so if I double-click this image.

Let’s say this is from the text, So maybe this image if I double click it. so I can upload a new image I can paste the URL let’s try that out if I go to digital eBook.

If you know what I’m just going to take any iPad pro PNG and let’s see because I wanted to be beautiful I always like my designs to be outstanding.

I’m going to copy the image URL address here. Yes, it worked well I mean this image doesn’t look PNG to me.

landerbolt image changes in new page

So but yeah this is how easy it is to do it. you can double click your buttons and when you click it you can edit the URL and their parameters and everything you want to edit here so yeah I really recommend you edit everything you’re going to do.

When you up for a page and that’s pretty useful I mean I think it’s pretty useful especially if you’re doing affiliate marketing or drop shipping and you want to split test different angles, different landing pages fast and you don’t want to lose time building website or landing page in click funnels, Unbounce or always has response whatever was there on pipe builder, funnel builder, whatever from a builder. whatever it is.

So this is how the Tool Works pretty awesome again I’m not trying to sponsor this. I am just saying that it’s pretty cool

—> so let me know your thoughts in the comments below.

If you want me to do another more in-depth research on how the lenderbolt works. But that’s pretty much, it’s pretty simple it’s not complicated at all.

You have the domain names you actually have some templates pre-built here from lenderbolt. so these are some templates you can use they have pre-built them it there with dummy text.

landerbolt templates

I mean they’re not as appealing as the one I downloaded so you know you have integrations.

If you want to do it I don’t have any integrations here. My domain names and my dashboard that’s it and then this is my ebook and I can click settings and again file manager visual editor pretty cool now.

Multivariate Testing for A/B Testing:

You have MVT settings this is the multivariate testing but this is one kind of advanced split testing. let’s say you want to split test different text. so you wanna experiment with which text or let’s say the button text you wanna split test between buy for 20 bucks, buy for 10 bucks, buy now, or learn more.

 
multivariate testing landerbolt

Let’s say five different variations of the text and you wanna see which one gets the most clicks so this this the MVT.

This is the two that you are going to use to split test that and basically it’s going to count how many clicks each variation has and let’s say buy more or learn more gets the most clicks and this too is going to tell you hey you know what using learn more outperforms buy for $20 so yeah it’s pretty cool yeah.

landing page

—-> Let me know in the comments below.

what do you guys think if you like that. Thanks for showing interest in reading this article.

 Cheers 

Follow @rksdigitals for more updates like this.

A step-by-step process to Duplicate Any Website / Landing Page in Just 30 Seconds Read More »

Scroll to Top